
Let’s face it, nail trims can be a real struggle with our furry friends. Most dogs aren’t exactly thrilled about having their paws handled, and the sound of clippers or grinders can send them running. But what if there was a way to make this whole process less stressful, even fun? Enter the dog nail scratch board with treats – a clever tool that lets your dog take the reins, literally filing their own nails while getting rewarded. It’s a game-changer for cooperative nail care.
Key Takeaways
- A dog nail scratch board with treats offers a less stressful alternative to traditional nail trimming methods like clippers or grinders.
- This tool works by training your dog to paw at an abrasive surface, naturally filing down their nails.
- The inclusion of treats makes the process rewarding and encourages your dog to participate willingly.
- When choosing a dog nail scratch board with treats, look for durable abrasive surfaces and effective treat compartments.
- Training your dog to use the scratch board involves positive reinforcement, starting with simple paw touches and progressing to scratching.
Introducing the Dog Nail Scratch Board with Treats

A Fear-Free Alternative to Traditional Nail Trims
Let’s be honest, most dogs don’t exactly look forward to nail trims. The whirring clippers, the awkward positioning, the potential for a quick snip too close – it’s enough to make any pup anxious. But what if there was a way to make nail maintenance less of a battle and more of a… well, a treat? Enter the dog nail scratch board. This innovative tool offers a completely different approach to keeping your dog’s nails at a healthy length. Instead of forcing them into submission, it encourages them to participate willingly, turning a dreaded chore into a positive experience. It’s all about cooperative care, where your dog is an active partner in their own grooming.
How a Dog Nail Scratch Board Works
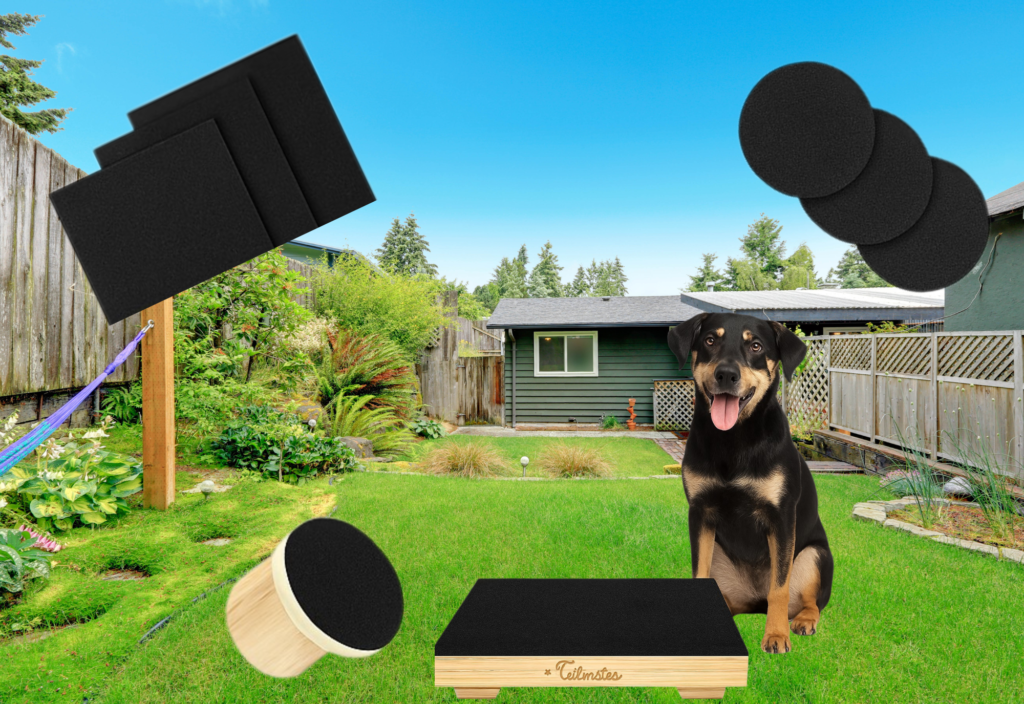
So, how does this magical board actually work? It’s pretty simple, really. The board itself has a rough, abrasive surface, kind of like sandpaper. You typically place it on the floor or prop it up at a comfortable angle for your dog. The key is that it also has a compartment designed to hold treats. Your dog is motivated by the yummy rewards to paw at the board. As they scratch and paw at the surface to get to the treats, their nails naturally get filed down. It’s a win-win: they get treats, and their nails get trimmed without any fuss.
Here’s a quick rundown of the process:
- Motivation: Treats are hidden in a compartment on the board.
- Action: Your dog paws or scratches at the board to access the treats.
- Result: The abrasive surface files down their nails during the scratching.
The Benefits of Cooperative Nail Care
Moving away from traditional nail trims to a cooperative method like using a scratch board has some serious perks. For starters, it drastically reduces stress for both you and your dog. No more wrestling matches or anxious whimpers! This method builds trust and strengthens your bond, as your dog learns that interacting with you leads to good things. Plus, it can be a great mental enrichment activity, keeping their minds engaged. It’s a gentler, more natural way to manage nail length.
Cooperative care means involving your pet in their own healthcare and grooming. It’s about building trust and making procedures less scary by using positive reinforcement and allowing the animal some control over the process. This approach can make a huge difference in a dog’s overall well-being and their perception of handling.
Making Nail Trims Fun with a Scratch Board
Transforming a Chore into a Game
Let’s be honest, most dogs don’t exactly jump for joy when it’s time for a nail trim. The whirring of a grinder or the snap of clippers can be pretty unsettling. But what if we could turn this dreaded task into something your dog actually looks forward to? That’s where the dog nail scratch board comes in. It’s not just about filing nails; it’s about engaging your dog in an activity that feels more like a game. By using a textured surface that your dog paw-scratches, you’re tapping into a natural behavior. The goal is to get them to enthusiastically use the board, wearing down their nails in the process. This shifts the focus from a potentially stressful handling session to a fun, interactive experience.
The Role of Treats in Training
Treats are the secret sauce, the ultimate motivator. When you introduce the scratch board, every little interaction your dog has with it should be rewarded. Think of it like this: paw touches the board? Treat! Paw slides across the board? Bigger treat! This positive reinforcement is key. It teaches your dog that using the board leads to good things, making them more likely to repeat the behavior. You’re essentially building a positive association with nail care. The more rewarding you make it, the more your dog will want to participate.
Here’s a simple breakdown of how to start rewarding:
- Initial Contact: Reward any touch of the paw to the board.
- Scratching Motion: Reward even a slight slide or drag of the paw.
- Sustained Scratching: Offer higher-value treats for longer or more vigorous scratching.
Encouraging Your Dog’s Independence
One of the most fantastic aspects of the scratch board is how it empowers your dog. Instead of you having to hold their paws and manipulate their feet, your dog takes the lead. They decide when and how much they want to scratch. This cooperative approach can significantly reduce anxiety for dogs who are sensitive about their feet being handled. It fosters a sense of control for them, making the whole process feel less like a confrontation and more like a partnership. They’re actively participating in their own grooming, which is a huge win for both of you.
The beauty of the scratch board lies in its ability to turn a potentially negative experience into a positive, self-directed activity for your dog. It’s about building trust and making grooming a shared, enjoyable moment rather than a battle of wills.
Choosing the Right Dog Nail Scratch Board with Treats
So, you’ve decided to give the nail scratch board a try. That’s awesome! But with a few different kinds out there, how do you pick the best one for your furry friend? It’s not just about grabbing the first one you see. We need to think about what makes a scratch board actually work well and keep your dog interested.
Key Features to Look For
When you’re shopping around, keep a few things in mind. You want something that’s effective, safe, and, most importantly, something your dog will actually want to use. The best scratch boards are durable, have a good abrasive surface, and include a way to offer treats.
Here’s a quick rundown of what to consider:
- Abrasive Surface Quality: This is what actually files the nails. It needs to be tough enough to do the job without being so rough it hurts your dog.
- Size and Shape: Does it fit your dog’s paws comfortably? Some are flat, others are curved. Think about what might be easier for your dog to interact with.
- Durability: Your dog is going to be pawing and scratching at this thing. It needs to hold up!
- Treat Dispensing Mechanism: How does it hold and release treats? Is it easy for your dog to figure out, or is it too complicated?
- Ease of Cleaning: Let’s be honest, things can get a little messy. Being able to clean it easily is a big plus.
Durable Abrasive Surfaces
This is probably the most important part. The surface needs to be abrasive enough to actually file down your dog’s nails. Think of it like sandpaper, but specifically designed for dog nails. Some boards use professional-grade sandpaper, which tends to be quite effective. Others might use a different material that wears down faster or isn’t as good at filing. You want a surface that will last and do the job without needing constant replacement. A good abrasive surface means less work for you and a better result for your dog’s paws. If the surface is too smooth, it just won’t do anything, and then what’s the point?
The Importance of Treat Compartments
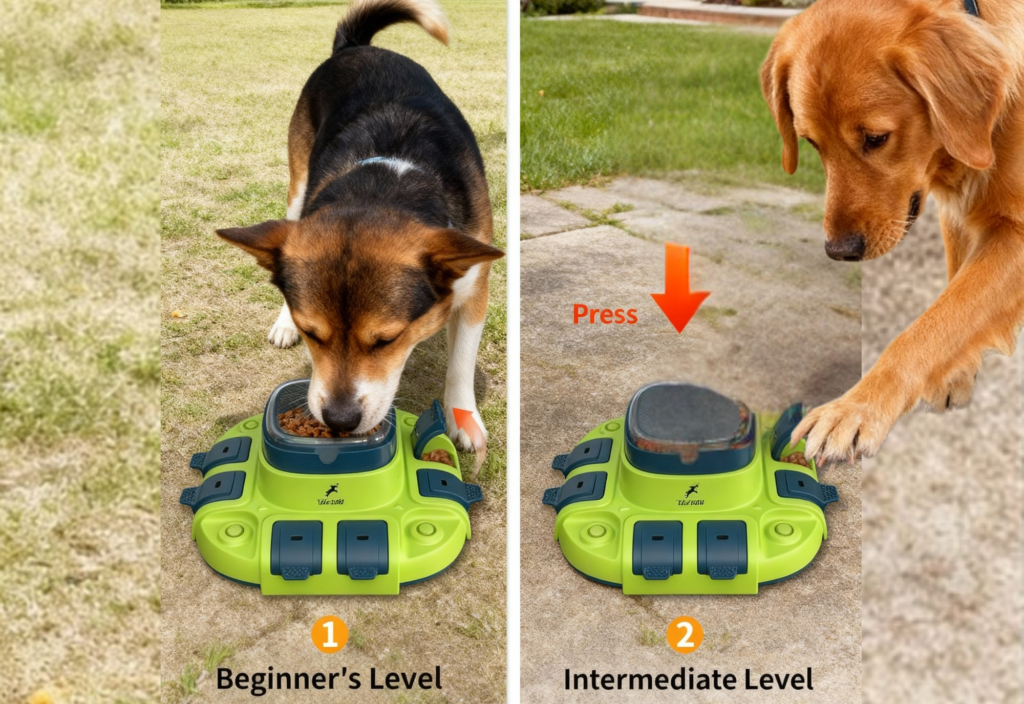
This is where the “fun” part really comes in. A treat compartment is a game-changer for training. It gives your dog a direct, immediate reward for interacting with the board. Some boards have simple compartments where you can hide treats, while others have more complex puzzle-like features. The easier it is for your dog to get a treat by pawing at the board, the faster they’ll learn and the more they’ll want to do it. If the treat mechanism is too difficult, your dog might get frustrated and give up. Look for a design that makes it relatively simple for your dog to figure out that pawing the board equals a tasty reward. This positive association is key to making nail trims a cooperative activity rather than a struggle. It’s amazing how quickly dogs pick up on this. For example, the DiggerDog nail file has a sliding compartment that dogs quickly learn to open for treats, making it a fast way to train your dog to use the board.
| Feature | Pros | Cons |
|---|---|---|
| Treat Compartment | High motivation, quick learning | Can be complex, potential for frustration |
| Abrasive Surface | Effective nail filing, durability | Can wear out, some materials are less tough |
| Size/Shape | Comfortable paw interaction, good coverage | May not suit all dogs, some are too small |
Training Your Dog to Use the Scratch Board
So, you’ve got your dog nail scratch board, and you’re ready to turn nail trims into a positive experience. This is where the real fun begins! The goal here is to teach your dog to use the board themselves, filing down their own nails. It sounds like a lot, but with patience and treats, it’s totally doable.
Step-by-Step Training Guide
Getting your dog comfortable with the scratch board takes a little time. Think of it like teaching them any new trick. We’re going to break it down into small, manageable steps.
- Introduce the Board: Let your dog sniff and explore the board. You can even put a tiny bit of peanut butter or a smear of something tasty on the abrasive surface to get them interested. Don’t expect them to scratch yet; just let them get acquainted.
- Paw Touches: Hold the board at a comfortable angle for your dog. When they touch it with their paw, even accidentally, mark the behavior with a clicker or a verbal cue like “Yes!” and immediately give them a high-value treat. This positive association is key.
- Encourage Scratching: As your dog gets the hang of touching the board, start rewarding them for more deliberate paw movements. You want to see them drag their paw across the surface. Gradually increase the criteria, rewarding longer or more forceful scratches.
- Front vs. Back Paws: For front paws, holding the board upright or at a slight angle usually works best. For back paws, you might need to prop the board up against furniture or a wall. Encourage your dog to stretch towards it, rewarding any movement that involves their back paws making contact.
- Increase Duration and Pressure: Once your dog is reliably scratching, start asking for longer scratching sessions and more pressure. This is when the nails will actually start to get filed down. Keep sessions short and sweet, maybe just a few minutes at a time, to keep your dog engaged.
Positive Reinforcement Techniques
Positive reinforcement is the name of the game here. We want your dog to want to use the scratch board. That means using rewards they absolutely love.
- High-Value Treats: Forget the regular kibble. Think small pieces of cheese, cooked chicken, hot dogs, or special training treats. Whatever your dog goes crazy for.
- Timing is Everything: Deliver the treat the instant your dog performs the desired action. This helps them understand exactly what they’re being rewarded for.
- Praise and Affection: Don’t underestimate the power of a happy voice and a good ear scratch. Combine treats with verbal praise to make the experience even more rewarding.
- Play as a Reward: For some dogs, a quick game of tug or fetch after a successful scratch can be just as motivating as a treat.
Troubleshooting Common Training Issues
Sometimes, training doesn’t go exactly as planned. That’s okay! Here are a few common hiccups and how to handle them:
- Dog is hesitant or scared: Go back to step one. Make sure the board isn’t intimidating. Try placing it on the floor initially, or use a less abrasive surface temporarily. Lots of praise and tiny treats for just being near it can help.
- Dog only licks or chews the board: This usually means the reward isn’t high enough, or they don’t understand the scratching action. Try a more exciting treat or go back to rewarding just paw touches. Make sure the treat compartment (if yours has one) is only accessible after a scratch.
- Dog isn’t scratching hard enough: You might be asking for too much too soon. Break it down further. Reward any movement that looks like a scratch, even a light one. Gradually build up the pressure needed for a reward.
- Dog loses interest quickly: Keep sessions short and fun! End on a positive note, even if it’s just for a simple paw touch. You can always try again later. Vary the treats or add a little play between attempts.
Remember, every dog learns at their own pace. What works for one might not work for another. Stay patient, keep it positive, and celebrate the small wins. The goal is a happy dog who cooperates with their own nail care, not a stressed-out pup. If you’re struggling, don’t hesitate to consult a professional trainer who uses positive methods.
DIY vs. Commercial Scratch Boards
Crafting Your Own Scratch Board
Thinking about making your own dog nail scratch board? It’s definitely an option if you’re handy and like to tinker. You can use a sturdy piece of wood or even a thick plastic container as the base. For the abrasive surface, sandpaper is your go-to. You’ll want to find some coarse-grit sandpaper that’s tough enough to actually file down nails. Attaching it securely is key – maybe some strong glue or even small screws if you’re feeling ambitious. Some people even use a piece of rough carpet or a specific type of textured matting. The trick is getting the right grit and making sure it’s really stuck on there so your dog doesn’t just peel it off. You might also want to think about how you’ll prop it up for your dog, or maybe add a little compartment for treats if you’re feeling fancy.
The biggest challenge with DIY is getting the abrasive surface just right. Too smooth and it won’t do anything, too rough and it might irritate your dog’s paws. Plus, you have to make sure it’s durable enough to withstand repeated scratching.
Evaluating Pre-Made Options
When you look at commercial scratch boards, there’s a pretty wide range out there. Some are super simple, just a flat board with sandpaper. Others are more elaborate, with built-in treat dispensers or curved designs. The material of the abrasive surface is a big deal. You’ll see things like professional-grade sandpaper, which is usually pretty effective. Some might use a different kind of textured material. It’s worth checking reviews to see how well they hold up over time and how effective they are at actually filing nails. Also, consider the size – you want something that’s appropriate for your dog’s size and reach.
Here’s a quick look at some common features:
- Abrasive Surface Material: Sandpaper (various grits), textured mats, or other durable filing materials.
- Design: Flat boards, curved boards, boards with treat compartments.
- Durability: How well the abrasive surface stays attached and how long it lasts before needing replacement.
- Training Support: Some brands offer guides or videos to help you teach your dog.
Cost-Benefit Analysis
Let’s talk money. A DIY scratch board can be pretty cheap to make, especially if you already have some materials lying around. You might spend anywhere from $10 to $30, depending on what you need to buy. Commercial options, though, can range quite a bit. Simple ones might be around $30-$50, while more complex ones with treat features can easily go for $70 to $150 or even more. So, if you’re on a tight budget and have the time and skills, DIY can save you a good chunk of cash. However, commercial boards often come with the advantage of tested durability, specific abrasive qualities, and sometimes, helpful training resources or support. If your dog learns quickly and uses the board consistently, a commercial board might be worth the investment for the convenience and effectiveness.
| Type of Board | Estimated Cost | Pros | Cons |
|---|---|---|---|
| DIY | $10 – $30 | Cost-effective, customizable | Requires skill, durability can be hit-or-miss |
| Commercial | $30 – $150+ | Tested durability, often effective, support | Can be expensive, less customization |
Maximizing the Benefits of Your Dog Nail Scratch Board
So, you’ve got your dog’s nail scratch board, and your pup is starting to get the hang of it. That’s awesome! But how do you really make the most of this tool? It’s not just about getting their nails a little shorter; it’s about building a better relationship with your dog and making their care a positive experience. Let’s talk about how to really integrate this into your routine and keep things rolling smoothly.
Integrating with Other Training Methods
Think of the scratch board as another tool in your positive reinforcement toolbox. It doesn’t have to be an isolated activity. If your dog is learning other paw-targeting behaviors, you can use the scratch board as a fun variation. For instance, if they know how to ‘shake,’ you can shape that into a paw-tap on the board. This cross-training can actually speed up their understanding and make them more versatile. It’s also a great way to practice impulse control. You can ask your dog to ‘wait’ before they get to scratch, rewarding them for staying calm and focused. This builds patience, which is a win-win for everyone.
Maintaining the Scratch Board
Just like any tool, your dog’s scratch board needs a little upkeep to keep working well. The abrasive surface, whether it’s sandpaper or a special grit material, will wear down over time. How often you need to replace it really depends on your dog’s scratching intensity and how often they use it. A good rule of thumb is to check it weekly. If you notice the surface isn’t filing their nails effectively anymore, it’s probably time for a refresh.
- Check the surface: Look for worn-out patches or areas where the grit is gone.
- Replace worn parts: Most boards have replaceable sandpaper or abrasive sheets. Keep spares on hand.
- Clean regularly: Wipe down the board to remove any dust or debris. This keeps the treat compartment clean too.
A well-maintained scratch board is more effective and more enjoyable for your dog.
Celebrating Successes with Your Dog
Every little bit of progress deserves a cheer, right? When your dog successfully uses the scratch board, even for a short scratch, make a big deal out of it! Use enthusiastic praise, a favorite toy, or a special high-value treat that they only get for this activity. This positive association is key. You can even track their progress. Maybe you start by rewarding every single scratch, then gradually move to rewarding a few seconds of scratching. Seeing their nails get shorter is the ultimate goal, but celebrating the effort and cooperation along the way builds a stronger bond.
Don’t get discouraged if your dog doesn’t master it overnight. Some dogs take to it faster than others. Consistency and patience are your best friends here. Keep sessions short, fun, and always end on a positive note. If your dog seems frustrated, take a break and try again later. The goal is to make this a positive experience, not a stressful one.
A Happier, Healthier Pup
So, ditch the nail trim drama! This scratch board idea really changes things up. It turns a chore into something your dog can actually look forward to, especially with those tasty treats involved. It’s a gentler way to keep their nails in check, and honestly, seeing your dog figure it out and do it themselves is pretty rewarding. Give it a shot; you might just find it’s the easiest way to keep your furry friend’s paws in good shape without all the usual fuss.
Frequently Asked Questions

What exactly is a dog nail scratch board?
A dog nail scratch board is a tool, often made of wood or plastic, with a rough surface like sandpaper. Your dog uses its paws to scratch this surface, which helps to naturally wear down their nails. Some boards even have special spots to hide treats, making it more fun for your dog.
How does a scratch board help with nail trimming?
Instead of you having to clip or grind your dog’s nails, which can be scary for them, a scratch board lets your dog do it themselves! It’s a way to make nail care less stressful for both you and your furry friend. Think of it as your dog giving themselves a manicure.
Is it hard to teach my dog to use a scratch board?
It can be pretty easy, especially if your dog already knows how to use its paws for things. You start by rewarding them for just touching the board, then for scratching it. Using treats and keeping training sessions short and fun makes a big difference. Some boards are designed to be extra easy to train with, like those with treat compartments.
What should I look for when buying a scratch board?
You’ll want a board with a tough, scratchy surface that can actually file down nails. It should be sturdy so it doesn’t break easily. Features like a treat holder can make training easier. Also, check if the company offers help or guides on how to train your dog to use it.
Can I make a dog nail scratch board myself?
Yes, you can! Many people make their own by using a piece of wood or even half a PVC pipe and covering it with sandpaper or grip tape. It’s a good way to save money and customize it for your dog. Just make sure the surface is rough enough to file nails.
Will a scratch board completely replace nail clippers or grinders?
For some dogs, a scratch board might be enough to keep their nails at a good length. For others, it might be a helpful addition to regular nail trims, making the process less scary. It’s a great way to get your dog involved in their own grooming and make it a more positive experience.
